Low-Voltage Wiring Guide: Doorbells, Thermostats, and Security
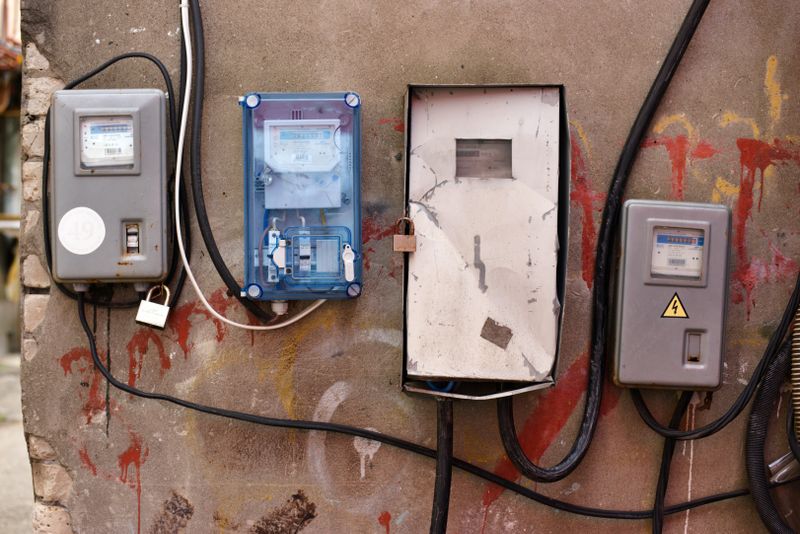
Low-voltage wiring encompasses the communication, control, and lighting systems that run at significantly lower voltages than line-voltage electrical circuits — typically 12V DC, 24V AC, or below 50V. While the safety stakes are lower than line-voltage work (low-voltage wiring poses minimal shock risk), doing it correctly ensures reliable operation of thermostats, doorbells, security systems, networks, and landscape lighting.
This guide covers the most common low-voltage systems in residential settings.
Understanding Low-Voltage Systems
Low-voltage wiring doesn’t require electrical permits in most jurisdictions (always confirm with your local AHJ), but the principles of clean installation still apply: proper cable routing, correct connections, adequate support, and logical labeling.
Common residential low-voltage systems:
- Doorbell (typically 16–24V AC from a transformer)
- Thermostat (24V AC, multiple conductors)
- Security system (12V DC, multiple zones)
- Network/data (Cat5e, Cat6, Cat6A — passive media)
- Telephone (RJ-11, largely obsolete)
- Coaxial cable (RG-6 for TV/antenna/satellite)
- Landscape lighting (12V DC from a transformer)
- Speaker wire (passive, line-level)
Doorbell Wiring
How a Doorbell System Works
A standard wired doorbell system has three components:
- Transformer: Reduces 120V AC to 16V or 24V AC. Usually mounted to an accessible junction box in the basement, attic, or near the panel.
- Push button: A simple momentary switch that closes the circuit when pressed.
- Chime: A mechanical or electronic unit that produces the bell sound.
Wiring path:
- Transformer → Chime (transformer terminal and one additional terminal)
- Chime → Front door button
- Front door button → Back to transformer (closing the circuit)
Doorbell Wire Specifications
Standard doorbell wire is 18 AWG, 2-conductor (for single button) or 3-conductor (for front and back buttons). This wire is not rated for line-voltage use — never use it for any line-voltage application.
For new installations, 18/2 or 18/3 bell wire runs from the transformer location to the chime and from the chime to each button location. Wire runs can be stapled to framing (with appropriate staples — not the type used for line-voltage cable) or run through walls like any low-voltage cable.
Doorbell Transformer Sizing
Transformers are rated in VA (volt-amperes) and voltage output:
| System | Transformer Rating |
|---|---|
| Single button, simple chime | 10 VA, 16V |
| Dual button, digital chime | 16 VA, 16V |
| Video doorbell (Ring, Nest, etc.) | 16–30 VA, 16–24V |
| Extended video doorbell runs | 30 VA, 24V |
Video doorbells draw more current than simple buttons — check the manufacturer’s minimum transformer rating. Many Ring and Nest doorbell problems are caused by an undersized or aged transformer.
Popular transformer brands: Newhouse Hardware, Sylvania, Friedland. Available at home improvement stores for $8–$20.
Troubleshooting a Dead Doorbell
- Test the transformer output with a multimeter (should read 16–24V AC depending on rating)
- Test voltage at the button terminals (should match transformer voltage when button is not pressed)
- Disconnect and direct-connect the chime wires to the transformer — if chime sounds, the button is the fault
- Check all wire connections — low-voltage terminals can loosen over time
Thermostat Wiring
The 24V Control System
Residential HVAC systems are controlled by 24V AC. A transformer in the furnace or air handler steps line voltage down to 24V, which powers the thermostat and control board. The thermostat acts as a series of switches that complete control circuits when specific temperature setpoints are reached.
Thermostat Terminal Designations
The standard color coding and terminal functions:
| Terminal | Color | Function |
|---|---|---|
| R or Rh | Red | 24V power (heat) |
| Rc | Red | 24V power (cooling, if split from heating transformer) |
| C | Blue or Black | Common (completes 24V circuit — the “C-wire”) |
| W or W1 | White | Heat (1st stage) |
| W2 | White/Brown | Heat 2nd stage |
| Y or Y1 | Yellow | Cooling/AC |
| Y2 | Yellow/Blue | Cooling 2nd stage |
| G | Green | Fan (blower) |
| O/B | Orange or Blue | Heat pump reversing valve |
| Aux | — | Auxiliary or emergency heat |
| L | — | Service indicator |
The C-Wire: Why It Matters
The C-wire (Common) is the return path for the 24V power circuit. Older thermostats that didn’t require continuous power could function without a C-wire — they “stole” power from the heat or cool signal wires. Modern smart thermostats (Nest, Ecobee, Honeywell T9, etc.) require a continuous 24V power supply to run Wi-Fi, displays, and logic — and they need the C-wire to complete that circuit.
If you don’t have a C-wire:
Option 1: Use an existing unused wire. If your thermostat cable has 5 or more conductors, there’s likely an unused wire that can be converted to the C-wire. Connect one end to the C terminal on the furnace/air handler control board, and the other end to the C terminal on the new thermostat.
Option 2: Ecobee Add-a-Wire kit (or similar). Some smart thermostats include an adapter that uses your existing wiring to create a virtual C-wire. Ecobee includes this; Nest provides similar functionality.
Option 3: Run a new thermostat cable. If no unused conductors are available, run new 18/5 (5-conductor, 18 AWG) thermostat cable from the air handler to the thermostat location. This is the clean solution that eliminates future compatibility issues.
Option 4: Plug-in thermostat power adapter. A wall outlet near the thermostat location can power an adapter that provides the C-wire connection. Less elegant but functional.
Common Thermostat Wire Colors
Standard 18 AWG thermostat cable color codes follow the terminal assignments above reasonably consistently, but older wiring and non-standard installations may vary. Always verify connections by tracing wires to the HVAC control board, not just by color.
Smart Thermostat Recommendations
Ecobee Smart Premium Thermostat: The most widely compatible smart thermostat — handles conventional (forced air) heat/cool, heat pumps, zoned systems, and includes a room sensor. HomeKit, Alexa, Google Home, and SmartThings compatible. Includes Add-a-Wire accessory. Around $250.
Google Nest Thermostat E: The budget Nest option. Simpler than the Learning Thermostat, compatible with most standard HVAC systems. Around $130.
Honeywell Home T9: Excellent humidity sensing and multi-room awareness. Strong HVAC compatibility and Honeywell’s well-developed app. Around $175.
Security System Low-Voltage Wiring
Hardwired vs Wireless
Modern security systems are predominantly wireless — sensors communicate via radio frequency and no wiring is required beyond the alarm panel’s power connection. However, hardwired systems (where each sensor connects via wire to the control panel) are still installed in new construction for several advantages:
- No battery maintenance on each sensor
- More reliable communication (no RF interference)
- Lower ongoing sensor cost
- Better for high-security applications
Security System Wire
22/4: Four-conductor, 22 AWG stranded wire. Standard for door and window contacts, motion sensors.
22/2: Two-conductor, 22 AWG. For simple contact sensors.
18/2: For bell/siren connections where higher current is needed.
Zone Wiring
Each zone (typically a group of sensors) wires back to the control panel. A standard star topology runs individual wire from the panel to each sensor — the most reliable approach. Series or loop wiring (one wire runs from sensor to sensor) is more economical but means a single wire break disables the entire zone.
Recommended Security Systems (Hardwired)
DSC PowerSeries Neo: Industry-standard professional installation panel. Extensive zone capacity, strong integration with monitoring stations, expandable for large properties. Professional installation recommended.
Elk M1 Gold: Favored by home automation enthusiasts for deep integration with smart home systems. Supports up to 208 zones with expansion.
Cat5e and Cat6 Network Wiring
Cable Types
Cat5e: Supports Gigabit Ethernet (1000BASE-T) up to 100 meters. The minimum standard for new installations.
Cat6: Higher bandwidth than Cat5e, supports 10 Gigabit Ethernet up to 55 meters. Thicker and less flexible than Cat5e — harder to terminate and pull through walls. For most homes, Cat5e is sufficient.
Cat6A: Augmented Cat6. Supports 10 Gigabit up to 100 meters. Very stiff and bulky — reserved for applications that specifically need it.
Home Network Wiring Best Practices
Star topology: Run all cables from a central patch panel (typically in a closet or utility space) to each room’s network port. This allows any port to be reassigned or patched to any device on the network.
Cable routing: Network cables can share conduit or pathways with telephone and coaxial cables but should not be in the same conduit or bundle as power wiring. EMI from power cables can degrade network performance.
Termination: RJ-45 connectors require punching down to a 568B or 568A standard (be consistent across all terminations). 568B is the most common residential standard.
Testing: A basic network cable tester ($15–$30) verifies that all eight conductors are connected correctly at both ends — essential after termination.
Helpful Tools
- Klein Tools VDV Scout Pro 3: Tests Cat5e/Cat6 and coaxial cables. Includes remote identifier for locating cables without a partner at the far end. Around $100.
- Fluke Networks CableIQ: Professional-grade network tester for verifying cable performance. Around $300+.
Landscape Lighting Low-Voltage
The 12V Landscape Lighting System
Residential landscape lighting typically uses a 12V DC low-voltage system:
- Transformer/driver: Plugs into a standard outdoor outlet and converts 120V to 12V. Usually includes timer and photocell.
- Landscape wire: 12 AWG or 14 AWG direct-burial two-conductor cable (brown or black).
- Fixtures: Path lights, spotlights, well lights — all 12V LED.
Wire Sizing for Landscape Lighting
Voltage drop is significant in 12V systems — more so than in 120V circuits because a 1V drop is 8% of 12V vs less than 1% of 120V. Size wires appropriately:
| Run Length | Fixture Load | Minimum Wire Gauge |
|---|---|---|
| Under 50 feet | Under 100W | 16 AWG |
| 50–100 feet | Under 150W | 14 AWG |
| 100–150 feet | Under 200W | 12 AWG |
| 150–200 feet | Any | 10 AWG |
Transformer Sizing
Add up all fixture wattages and multiply by 1.25 for transformer size:
- 10 fixtures × 3W each = 30W × 1.25 = 37.5W transformer minimum (choose 50W or 75W)
Popular transformer brands: Kichler, VOLT Lighting, Malibu. For quality, VOLT Lighting’s transformers are preferred by landscape professionals.
Installation Tips
- Bury landscape lighting cable at least 6 inches deep (12 inches preferred for protection)
- Use direct-burial-rated cable — standard speaker wire deteriorates underground
- Leave slack in buried cable runs to accommodate ground movement
- Use waterproof wire connectors at each fixture — twist-and-lock landscape connectors are simple and reliable
Low-voltage wiring is accessible for most capable homeowners. The lower safety stakes and minimal permitting requirements make it an approachable DIY project that meaningfully upgrades home functionality, security, and automation capability.
Keep low-voltage wiring separate from line-voltage work
These resources connect thermostat controls, smart-home wiring, and safe electrician handoff notes.
- Smart thermostat wiring guide
Use compatibility checkers and terminal labels before moving thermostat wires.
- Electrician handoff checklist
Document system labels and photos before asking for help.
- Video doorbell installation guide
Compare another low-voltage smart-home installation with transformer constraints.

Amperage HQ Editorial Team
Independent trade-focused editorial team