Recessed Lighting Installation Guide
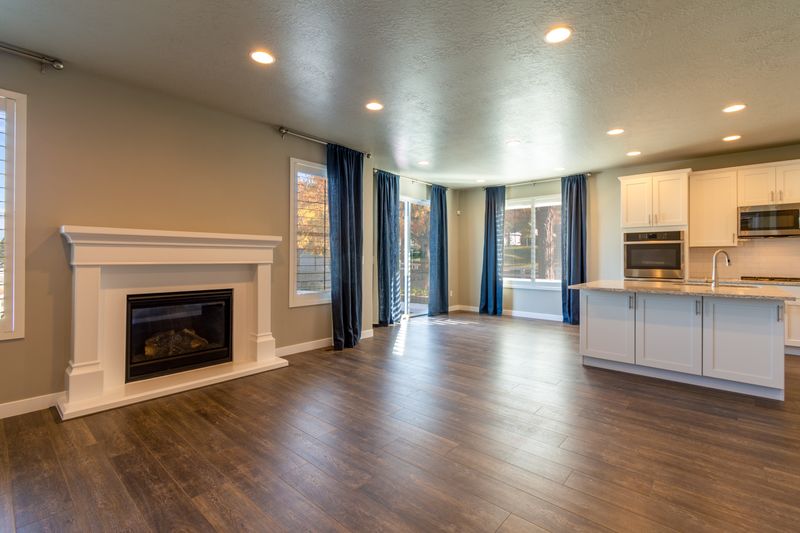
Recessed lighting transforms a room — it provides clean, modern illumination without the visual clutter of surface-mounted fixtures. But done poorly, it looks haphazard and leaves dark corners. This guide covers everything from layout planning through final trim installation so you get results that look professionally designed.
Planning Your Layout
Fixture Spacing
The key rule: space recessed lights at a distance equal to half the ceiling height, measuring from wall to first light and between fixtures.
- 8-foot ceiling → fixtures 4 feet apart and 2 feet from walls
- 9-foot ceiling → fixtures 4.5 feet apart and 2.25 feet from walls
- 10-foot ceiling → fixtures 5 feet apart and 2.5 feet from walls
This formula produces even illumination across the room. Tighter spacing (closer to 3 feet on an 8-foot ceiling) creates brighter, more overlapping illumination suitable for task areas. Wider spacing is appropriate for accent or ambient lighting in large rooms.
Light Count for General Illumination
A useful guideline: one recessed light per 4–6 square feet of ceiling for good general illumination. This varies with ceiling height and fixture brightness — brighter fixtures (higher lumen output) can cover more area.
Example: A 12’ × 16’ room (192 sq ft) needs approximately 32–48 lights at the conservative end, or 16–24 at the optimistic end. In practice, most residential rooms use 6–12 fixtures with higher-output LED retrofit kits (800–1,000 lumens each) for comfortable general lighting.
Fixture Size
Common recessed light housing diameters:
- 4-inch: Accent lighting, small rooms, corridors. Output typically 350–650 lumens.
- 5-inch: Versatile mid-size for most residential applications
- 6-inch: Most common residential size, 800–1,200 lumens per fixture, works in most rooms
6-inch fixtures are the standard choice for most residential rooms. 4-inch works well in kitchens, bathrooms, and hallways where a smaller fixture profile is appropriate.
Task Lighting Placement
Beyond general layout, place task-specific fixtures:
- Over kitchen countertops: 18–24 inches from the wall, one fixture per 3–4 linear feet of counter
- Over bathroom vanity: One fixture on each side of the sink/mirror (not directly overhead, which causes shadowing)
- Reading areas: One fixture 12–18 inches in front of a typical chair position
Choosing the Right Housing
IC vs Non-IC
This is the most important technical decision in recessed lighting selection:
IC-Rated (Insulation Contact): The housing can be in direct contact with insulation. Required whenever the fixture is installed in a ceiling with insulation above it — which includes virtually every first-floor ceiling and any attic-floor ceiling. IC-rated fixtures have sealed, fireproof housings that allow insulation to touch them safely.
Non-IC: Not for use where insulation will contact the fixture. Non-IC fixtures require 3 inches of clearance from insulation on all sides. These are appropriate only for second-floor ceilings with an uninsulated room above — unusual in most homes.
When in doubt, always choose IC-rated. Using a non-IC fixture where insulation will contact it is a fire hazard and a code violation.
Airtight (AT) Rated
Airtight-rated fixtures (marked AT or Air-Tight) prevent conditioned air from leaking into the attic through the fixture opening. In any insulated ceiling, airtight fixtures prevent:
- Conditioned air loss (energy waste)
- Moisture-laden air entering the attic (mold risk)
- Unconditioned attic air entering the living space
Look for fixtures with both IC and AT ratings for insulated ceilings.
New Construction vs Remodel Housings
New construction housings: Designed to install from above (before drywall). They have mounting legs that slide and nail to joists. These are the easiest to install and most secure — use them whenever you’re working before drywall.
Remodel (retrofit) housings: Designed to install through the drywall from below. They have spring clips, rotating wings, or expanding clips that grip the drywall from behind. These are required when adding lighting to existing finished ceilings.
Wet, Damp, and Dry Location Ratings
- Dry location only: Standard interior rooms away from moisture
- Damp location listed: Covered outdoor areas, bathrooms not directly over tubs
- Wet location listed: Direct exposure to rain, shower interiors
Use the appropriate rating for the installation environment. Using a dry-rated fixture in a shower is a code violation and a safety hazard.
Tools and Materials
- Recessed light housings (appropriate type and rating)
- LED trim kits or integrated LED fixtures
- Electrical cable (14/2 NM-B for 15A circuits, 12/2 for 20A)
- Wire connectors (wire nuts or push-in connectors)
- Non-contact voltage tester
- Drywall saw or oscillating tool (for remodel installs)
- Drill with hole saw (typically 3.5” or 4” for 4” fixtures, 6.25” for 6” fixtures)
- Fish tape or glow rods
- Stud finder
- Pencil, tape measure, square
Step-by-Step: New Construction Installation
Step 1: Plan and Mark Locations
After confirming ceiling joist locations (stud finder or visual inspection in open framing), mark fixture locations with a pencil. Transfer your layout plan to the ceiling, accounting for joists — fixtures should be between joists, not on them.
Step 2: Install the Housing
New construction housings come with adjustable bar hangers. Extend the bar between two joists at the desired fixture location and nail (or staple-drive) the bar ends to the joist faces.
Position the housing so the trim ring will be flush with the drywall — most housings have an adjustable depth stop or reference marks for 1/2” or 5/8” drywall.
Step 3: Run Cable
Before drywall, running cable is straightforward:
- Route 14/2 NM-B (for a 15A circuit) or 12/2 (for 20A) between fixtures
- Leave a 12-inch tail of cable at each housing
- Staple cable within 12 inches of each housing and every 4.5 feet
- Drill through framing as needed for cable routing
Most recessed lighting uses a daisy-chain configuration: cable runs from the switch to the first fixture, then from the first to the second, and so on.
Step 4: Make Wire Connections
At each housing, enter the cable through the knockout or cable connector:
- Black (hot) → black fixture lead
- White (neutral) → white fixture lead
- Bare or green (ground) → green fixture lead or housing ground screw
Use wire nuts or push-in connectors (Wago 221 series are popular for their reliability). Tuck connections into the junction box portion of the housing.
Step-by-Step: Remodel (Retrofit) Installation
Step 1: Mark Fixture Locations
Use a stud finder to confirm joist locations. Mark fixture centers between joists.
Before cutting, probe the ceiling with a thin wire at the center of each planned location to check for obstructions (fire blocking, bridging, or old wiring). You can also drill a small exploratory hole and use an inspection camera.
Step 2: Cut the Opening
Use a hole saw matching your fixture’s rough opening dimension (check the fixture’s instructions — commonly 5.5” for a 6” fixture or 3.5” for a 4” fixture). Cut slowly to avoid cracking drywall beyond the opening.
Step 3: Run Cable to Each Location
For finished ceiling runs:
- Use a stud finder to map the path
- Drill into the wall at the switch and at each ceiling location
- Fish cable horizontally through the ceiling cavity between fixture locations using fish tape or glow rods
- If the ceiling cavity is blocked by fire stops, use an offset drill bit to drill through blocking
Step 4: Install the Remodel Housing
Feed the cable into the housing through the cable connector. Connect wires inside the housing junction box. Fold the wires into the box, then insert the housing into the ceiling opening. Expand the spring clips or mounting wings to grip the back of the drywall.
Step 5: Install the Trim and Bulb
The trim (decorative ring and baffle or lens) snaps into the housing. For IC/AT integrated LED fixtures (a single piece that replaces the housing, bulb, and trim), install according to the manufacturer’s instructions — most use spring-loaded clips.
Dimming Recessed Lights
LED recessed lights are dimmable, but the dimmer and LED must be compatible. Issues with incompatible dimmer/LED combinations:
- Flickering at certain dim levels
- Buzzing from the dimmer or fixture
- “Drop-out” where lights cut off before reaching zero
Solution: Use LED-compatible dimmers from Lutron (Caseta, Diva LED+) or Leviton (Decora Smart). Check your fixture manufacturer’s compatibility list — most publish compatible dimmer models.
Lutron’s Caseta system is the most widely compatible and reliable for LED dimming in residential applications.
Recommended Products
Housings and Integrated Fixtures
Halo H99RICT (6-inch, New Construction, IC/AT): Industry-standard new construction housing, IC and airtight rated, widely compatible with 6-inch trims. Around $10–$15 per housing.
Halo HLB6099FS1EMWR (6-inch LED Integrated Retrofit): All-in-one LED retrofit kit that installs in existing 6-inch openings without a separate bulb. 650 lumens, dimmable, 90 CRI, approximately $20–$25 per fixture.
Philips WiZ 6” Smart Recessed Light: Wi-Fi enabled, dimmable, tunable white (2200K–6500K), works with Alexa and Google. No hub required. Around $25–$30 per fixture.
Lutron Caseta Diva LED+ Dimmer: The most reliable LED-compatible dimmer for residential use. Handles up to 150W of LED load. Works with Lutron’s Caseta smart system if desired. Around $25–$35 per switch.
Common Mistakes to Avoid
Using non-IC fixtures in insulated ceilings: Fire hazard, code violation, insurance risk.
Spacing fixtures by room size without considering ceiling height: A 10-foot ceiling needs wider spacing than an 8-foot ceiling for the same visual effect.
Neglecting dimmers: Hard-wired recessed lights without dimming capability limit the room’s versatility. Install dimmer-capable dimmers from the start.
Using incandescent PAR bulbs in remodel cans: Always use LED. Incandescent bulbs generate significant heat that shortens fixture and junction box life, especially in IC-rated housings.
Not testing AFCI/GFCI compatibility: In 2023 NEC jurisdictions requiring AFCI for bedroom and living room circuits, make sure the fixtures are compatible with the AFCI breaker — some older LED drivers can cause AFCI nuisance trips.
Recessed lighting installed correctly provides decades of reliable, attractive illumination. Take the time to plan the layout carefully before cutting any holes, choose IC/AT-rated fixtures whenever there’s any possibility of insulation contact, and use compatible dimmers from the start.

Amperage HQ Editorial Team
Independent trade-focused editorial team