Under Cabinet LED Lighting Installation Guide
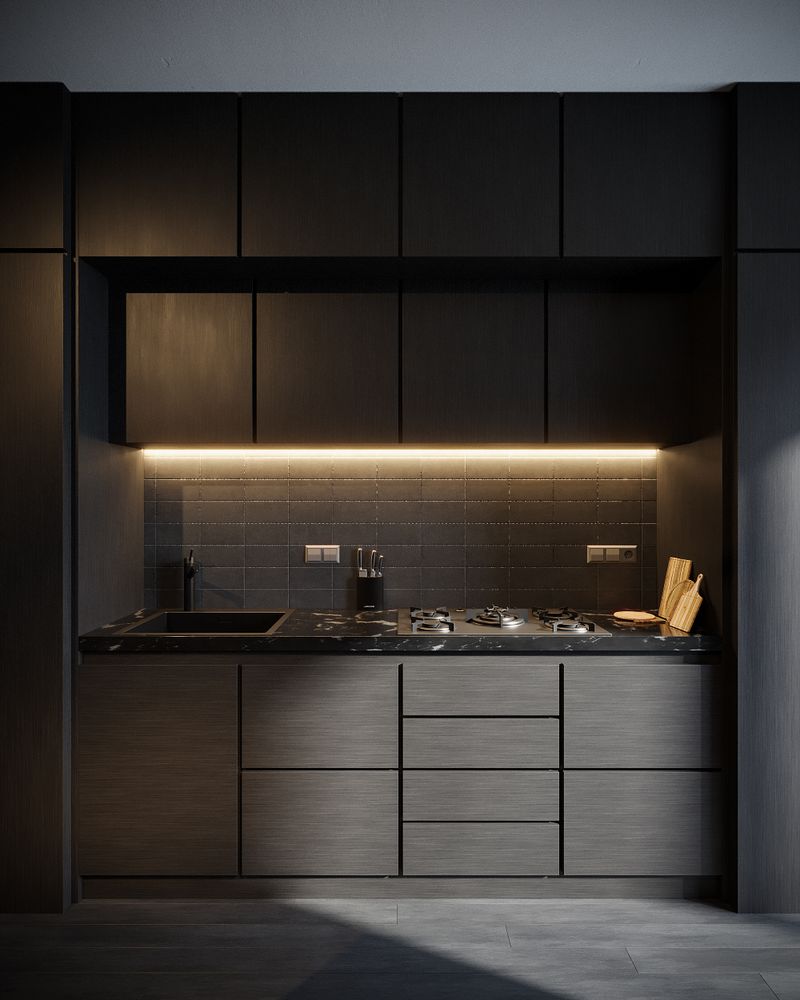
Under cabinet lighting transforms a kitchen. It illuminates the workspace where you actually cut, chop, and prep — eliminating the shadows that overhead lights create when you’re standing at the counter. It also adds warmth and depth to the kitchen aesthetic that’s hard to achieve any other way.
This guide covers everything from fixture type selection through hardwired and plug-in installation.
Types of Under Cabinet LED Lighting
LED Strip Lights
Flexible LED strips are a continuous ribbon of small LED chips on a flexible PCB (printed circuit board). They run in 12V or 24V DC and come in reels of 5 meters or 16 feet.
Advantages:
- Continuous, even light distribution along the full cabinet length
- Extremely flexible — can be cut to exact length
- Wide variety of color temperatures and CRI options
- Can be used around corners with flexible channels
- Most economical per foot of illumination
Disadvantages:
- Require a 12V or 24V power supply (driver)
- Bare strips need an aluminum channel/diffuser to look finished
- Lower total lumen output per unit length than bar lights (compensated by running full cabinet length)
Best for: Full-length, continuous illumination; budget-conscious installations; custom lengths
LED Bar Lights (Linear Under Cabinet Lights)
Fixed-length rigid LED bars, typically available in 9”, 12”, 18”, 24”, 30”, and 36” lengths. These are the most popular choice for straightforward kitchen installations.
Advantages:
- Clean, finished appearance — no exposed strips or loose drivers
- Simple mounting — typically screws or magnetic mount
- Available hardwired or plug-in
- Built-in driver (no separate power supply needed for plug-in models)
- Good lumen output in a compact, rigid form
Disadvantages:
- Fixed lengths may not perfectly fit cabinet spans
- Hardwired models require electrical connections at each fixture
- More expensive than LED strips for equivalent coverage
Best for: Most residential kitchens, especially with standard 24–36” cabinet widths
LED Puck Lights
Circular, disc-shaped fixtures that mount individually under cabinets. Usually spaced 12–18 inches apart.
Advantages:
- Point-source accent effect rather than continuous wash
- Very simple installation
- Available battery-powered, plug-in, or hardwired
Disadvantages:
- Creates hot spots and shadows between pucks — not ideal for task lighting
- Visible individual fixtures rather than a clean light line
Best for: Accent and display lighting, not primary task lighting; budget option for wine racks or display areas
Plug-In vs Hardwired
Plug-In Under Cabinet Lights
Plug-in lights connect to standard 120V outlets via a cord. Many modern under-cabinet light sets include a junction connector so multiple bars can be linked together and powered from a single outlet.
Advantages:
- No electrician needed — truly DIY
- Easily relocatable
- No permit required
- No wiring in walls
Disadvantages:
- Power cord is visible unless hidden behind a valance or inside cabinet
- Outlet must be accessible inside or at the back of the cabinet
- Limited by outlet locations
Best for: Renters, temporary installations, kitchens with accessible outlets inside upper cabinets
Hardwired Under Cabinet Lights
Hardwired lights connect directly to the home wiring via a junction box hidden above the cabinet or inside the cabinet. No visible cord.
Advantages:
- Completely hidden wiring — clean, professional appearance
- Controlled by a dedicated wall switch or dimmer (no bending down to reach a cord switch)
- Can be integrated into smart home dimmer systems
Disadvantages:
- Requires electrical work (junction box, switch wiring) — may need an electrician
- Permit may be required for new circuit wiring
- Not easily relocated
Best for: New kitchen builds or renovations, permanent installations, clean appearance priority
Selecting the Right Fixtures
Lumens for Under Cabinet Lighting
Task lighting under cabinets typically needs 250–500 lumens per 12 inches of countertop for good illumination. This is higher than you might expect because under-cabinet lights are positioned close to the work surface — less throw distance, more concentrated output needed.
For a 24-inch cabinet section: 500–1,000 lumens is a useful target. For a 36-inch section: 750–1,500 lumens.
Color Temperature
Under cabinet task lighting is typically 2700K–4000K:
- 2700K–3000K: Warm white — matches kitchen ambient lighting, best for warm-tone kitchens
- 3500K–4000K: Neutral white — excellent color rendering for food prep, slightly more clinical appearance
Recommendation: Match the color temperature of your recessed lights or pendant lights for a cohesive look.
CRI
For food preparation areas, CRI 90+ is strongly recommended. Higher CRI makes food look more natural and appealing and helps you accurately judge doneness, ripeness, and freshness.
Many premium under cabinet lights specifically market high CRI (often 92–95 CRI).
Dimmability
Dimmable under cabinet lights allow you to set a lower light level in the evening or when ambient lighting is sufficient. For hardwired installations, pair dimmable fixtures with a compatible LED dimmer (Lutron Caseta is reliably compatible with most LED fixtures).
Recommended Products
LED Strip Light Systems
Waveform Lighting FC Series LED Strip (24V, 90+ CRI): Professional-grade LED strip with excellent CRI, consistent color temperature along the full strip, and good lumen output. Available in 2700K–5000K. Use with their aluminum channels for a finished appearance. Approximately $15–$25 per foot installed in channel.
SIRS-E LED Strip Lights: A step-up option with even better CRI (95+) for color-critical kitchens or those who are particular about light quality. More expensive but noticeable difference in food appearance.
Govee Wi-Fi LED Strip: For those wanting smart control with tunable white (2200K–6500K adjustable) and app/voice control. Less demanding on CRI but excellent feature set at a reasonable price.
LED Bar Lights
Kichler Direct-Wire LED Bars (Under Cabinet): Kichler’s hardwired bar lights are a popular choice for professional installations. Clean housing, good CRI (90+), available in multiple finishes (nickel, bronze) to match kitchen hardware. Linkable design allows multiple bars from one power source.
IKEA SILVERGLANS (Plug-In Bar): IKEA’s LED bar light with dimmer is excellent value for plug-in applications. Simple mounting, clean appearance, available in warm white. Works with standard IKEA smart home dimmer system.
Lithonia Lighting UCLD (Direct Wire): A budget-friendly hardwired option widely available at home improvement stores. Good for projects where price-per-fixture matters.
Step-by-Step: Hardwired LED Bar Light Installation
What You’ll Need
- Under cabinet LED bar lights (hardwired type)
- Low-voltage wire connector or junction box supplies
- Single-gang junction box and blank cover (or recessed cover)
- Wire (12 AWG if adding a new circuit; fixture wiring is usually 18 AWG or lower)
- Dimmer switch compatible with LED (Lutron DVLV-600P or Caseta series)
- Non-contact voltage tester
- Drill with bits
- Screwdriver
Step 1: Plan the Installation
Before installing anything, plan:
- Where will the junction boxes go? (Above the cabinets or inside the cabinet top is most common)
- Will fixtures be linked (one power source to multiple fixtures) or individually connected?
- Where will the switch or dimmer be located?
- Is there an existing circuit to add to, or do you need a new circuit?
For most kitchen under cabinet installations, tapping into an existing kitchen lighting circuit (if it has capacity) is acceptable and avoids running a new circuit. Verify the existing circuit has capacity.
Step 2: Run Wiring
The wiring path from the switch location (typically at an existing switch position on the kitchen wall) to the under-cabinet area requires either fishing through walls or using existing wiring pathways.
Common route: From a switch box in the kitchen wall, up through the wall cavity, into the attic or above-ceiling space, and down to the junction box location above or inside the upper cabinet.
Run appropriate wire (12 AWG NM-B for a 20A circuit, 14 AWG for 15A).
Step 3: Install Junction Boxes
Mount junction boxes at the top of each upper cabinet where fixture supply wires will connect to the circuit wiring. Boxes are typically mounted inside the cabinet (hidden by a toekick cover or simply not visible from normal viewing angles) or on top of the cabinets.
Step 4: Mount the Fixtures
Following the fixture manufacturer’s instructions:
- Measure and mark mounting hole locations under each cabinet
- Drill pilot holes
- Attach fixtures with provided screws
- Route fixture power wires toward the junction box
Step 5: Make Electrical Connections
At each junction box, connect:
- Black (hot) circuit wire → black fixture lead
- White (neutral) circuit wire → white fixture lead
- Bare/green (ground) → ground terminal on fixture or bare wire
For linked fixture sets, the manufacturer provides a wiring diagram for how to connect multiple fixtures in a chain.
Step 6: Install the Dimmer Switch
Replace the existing switch (or install a new switch) with a dimmable LED-compatible dimmer. For under cabinet lights, a single-pole dimmer handles the load.
Lutron Caseta dimmers are the most reliable choice for LED under cabinet lights — check the specific fixture manufacturer’s compatible dimmer list.
Step 7: Restore Power and Test
Turn on the circuit and verify all fixtures illuminate. Test the dimmer through its full range — look for smooth dimming without flicker or buzzing.
Aluminum Channel Installation for LED Strips
If using LED strip lights, aluminum channels create a finished appearance and improve heat dissipation:
-
Select the channel: Channels come in surface-mount, corner, and recessed varieties. For under cabinet, surface-mount or slim recessed channels work well.
-
Cut to length: Cut the aluminum channel to the exact cabinet width with a hacksaw or miter saw.
-
Mount the channel: Drill pilot holes and screw the channel to the underside of the cabinet.
-
Install LED strip: Remove the adhesive backing and press the strip into the channel’s track.
-
Snap in the diffuser: The frosted plastic diffuser snaps into the channel, spreading the individual LED points into a smooth light band.
-
Connect power: The strip’s tail connects to the driver’s output via a quick-connect or solder joint.
Under cabinet lighting is one of the best kitchen improvements for cooking comfort and kitchen aesthetics. The hardwired approach creates the cleanest, most professional result — and in a kitchen renovation where cabinets are being installed new, adding the wiring before the cabinets are fully in place is the most practical approach.

Amperage HQ Editorial Team
Independent trade-focused editorial team